Guangdong 3D Profiler is a non-contact optical instrument
Release Time:
2022-09-09 09:03
Guangdong 3D Profiler is a non-contact optical instrument with dual LED light source, which basically does not damage the sample. Select different measurement modes according to the sample. Mainly used for mutual moving interference mode (PSI) for measuring smooth surface roughness, and vertical scanning interference mode (VSI) for height, width, radius of curvature, roughness measurement, etc.
The surface defect of steel is an important factor that determines the quality. Reducing surface defects is an effective measure to improve product quality, reduce production costs and increase economic benefits. In order to reduce surface defects in steel, timely defect detection is required in order to adjust the rolling mill in time. As an automatic online surface defect detection device, the profiler is widely used in the online detection of round steel, rebar, steel pipe, H-beam, T-beam, square steel, etc.
Guangdong 3D profile measuring instrument is a non-contact non-destructive three-shaped surface measuring instrument with convenience, excellent performance and high cost performance. The ninth generation system uses the unique dual LED illumination source ZL technology to better detect ultra-smooth and very rough surfaces. The measurement range can reach sub-nanometer roughness to millimeter step heights. Easy-to-use operating modes, fast data acquisition capabilities, powerful software features, Egyptian-grade reproducibility, and more. At the same time, the optional X-Y automatic stage makes it possible to program samples.
This instrument adopts FLCOS principle, which can realize fast confocal scanning without mechanical movement. It has the characteristics of high speed, stability and unlimited use time. Because the mechanical vibration can cause jitter during the measurement and the usage time is limited, other existing brands of confocal microscopes all use lens vibration scanning.
Features of Guangdong 3D Profiler:
1. The 3D form is lifelike, presenting the nano world.
Users can observe nanometer-level details in the field of view using a color confocal observation method.
2. The 3D scanning speed is incredible.
A full 3D scan takes less than 10 seconds. When scanning samples with low reflectivity at scan speed, 3D scan time is less than 3 seconds.
High quality objective lens with good image quality.
Compared to laser confocal microscopy, horizontal and longitudinal resolutions reach the limits of optical microscopy systems.
4. Multi-wavelength LED light source.
There are four independent LED light sources for red, green, blue and white to meet various application needs.
5. The picture quality is amazing.
The display resolution reaches 2560×1440 pixels, using a 1360×1024 high-resolution CCCD. Images are sharp, vivid, and lag-free.
6. Sequential lighting of color images.
In red, green, red, green and blue LEDs alternately illuminate and restore the three color images to a high-resolution color image. Compared with other brands, it adopts pixel interpolation algorithm, which has better color protection and restoration performance.
Latest News
2022-09-09
3D visual inspection, the era of 3D measurement is coming
With the development and progress of machine vision, 3D machine vision has ushered in a huge opportunity in the automation industry. According to Grand View Research, by 2027, the global 3D machine vision market is expected to reach US$3.46 billion, with a compound annual growth rate of about 14.7%. Quality assurance and inspection applications are expected to occupy the top spot in the 3D machine vision market by 2022.
View Details 》2022-09-09
Guangdong 3D profile measuring instrument is based on CCD digital image
Guangdong 3D profile measuring instrument is based on CCD digital image, and is produced by relying on computer screen measurement technology and powerful software ability of spatial geometric calculation. After the computer is installed with a special control and graphic measurement software, it becomes a measurement brain with a software soul and is the main body of the entire device. It can quickly read the displacement value of the optical ruler, and obtain the result immediately through the operation of the software module based on spatial geometry; and generate a graph on the screen, and the operator can compare the graph, so that the possible deviation of the measurement can be visually distinguished. Guangdong 3D contour measuring instrument is a high-precision optical Guangdong 3D contour measuring instrument. It is composed of a high-precision workbench structure.
View Details 》2022-09-09
Guangdong 3D Profiler is a non-contact optical instrument
Guangdong 3D Profiler is a non-contact optical instrument with dual LED light source, which basically does not damage the sample. Select different measurement modes according to the sample. Mainly used for mutual moving interference mode (PSI) for measuring smooth surface roughness, and vertical scanning interference mode (VSI) for height, width, radius of curvature, roughness measurement, etc.
View Details 》2022-09-09
Analysis of the scale and development prospect of China's machine vision market
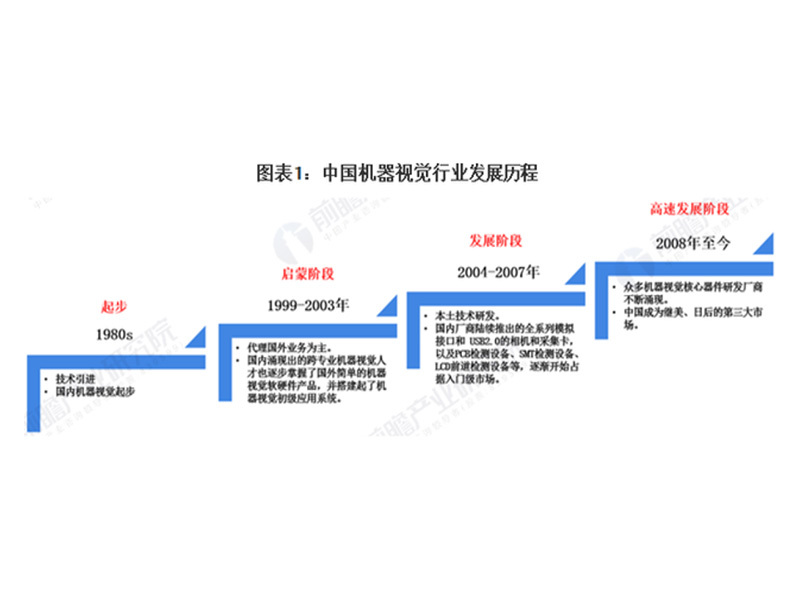
Domestic machine vision originated from the first batch of technology introductions in the 1980s. Since many electronics and semiconductor factories settled in Guangdong and Shanghai in 1998, machine vision production lines and advanced equipment have been introduced into my country, and the agents and system integrators of international machine vision manufacturers have been born. The development of machine vision in China has mainly gone through three stages. The first stage is the enlightenment stage from 1999-2003. At this stage, Chinese enterprises mainly serve customers through agency business, and guide customers to understand and recognize machine vision in the process of service, thereby opening the historical process of machine vision in China. The second stage is the development stage from 2004 to 2007. At this stage, local machine vision companies began to explore the research and development of machine vision software and hardware devices carried by more independent core technologies, and key breakthroughs were made in many application fields. The third stage is the high-speed development stage after 2008. At this stage, many R&D manufacturers of machine vision core components continued to emerge, and a large number of real system-level engineers were continuously cultivated, which promoted the high-speed and high-quality development of the domestic machine vision industry.
View Details 》2022-09-09
what? Flash meter? Where is holy?
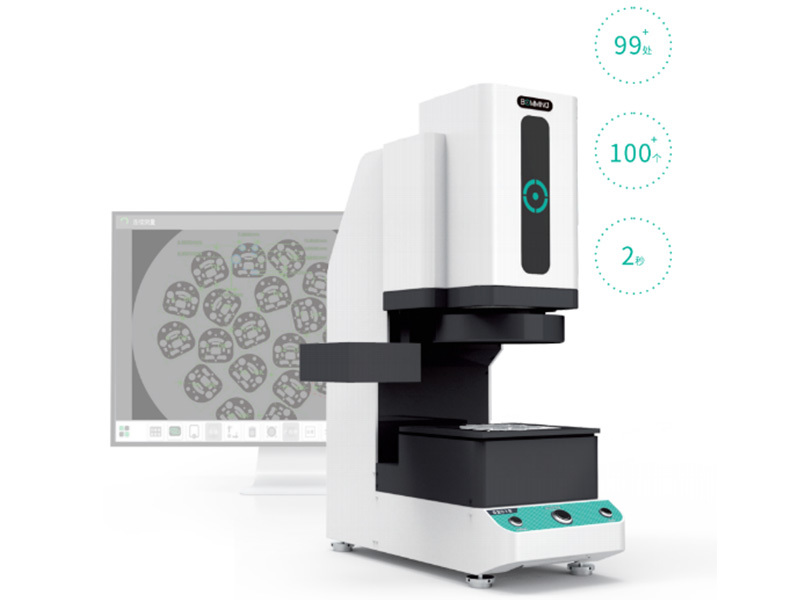
Flash tester, many people may be hearing this name for the first time. She has many names, including intelligent automatic flash tester, flash test imager, one-button image tester, quick tester, etc. Flash tester should be regarded as a nickname. "Flash" means fast, just like lightning, it is conceivable that it is a fast measuring instrument, mainly used for two-dimensional measurement, and can be widely used in mobile phones, automobiles, precision parts, machinery, electronics, molds, connections It can be said that "where there is measurement, there is a demand for flash testers". It is especially suitable for batch measurement of small-sized workpieces such as mobile phone accessories, gears, springs, screws, etc.
View Details 》2022-09-09
3D visual inspection, the era of 3D measurement is coming
With the development and progress of machine vision, 3D machine vision has ushered in a huge opportunity in the automation industry. According to Grand View Research, by 2027, the global 3D machine vision market is expected to reach US$3.46 billion, with a compound annual growth rate of about 14.7%. Quality assurance and inspection applications are expected to occupy the top spot in the 3D machine vision market by 2022.
View Details 》


